
In this article, we will show you how to create and manage labels on Thinfinity Remote Workspace. The labels are very useful and will help you in different ways:
Labels work in an organizational way, so you can manage your different profiles if needed.
You can create labels in the Configuration Manager and also through the Thinfinity Remote Workspace landing page.
Admin created Labels:
To create labels with the Manager, just follow these steps
1. Open the Configuration Manager
2. Go to the “Access Profiles” tab and click on “Add”
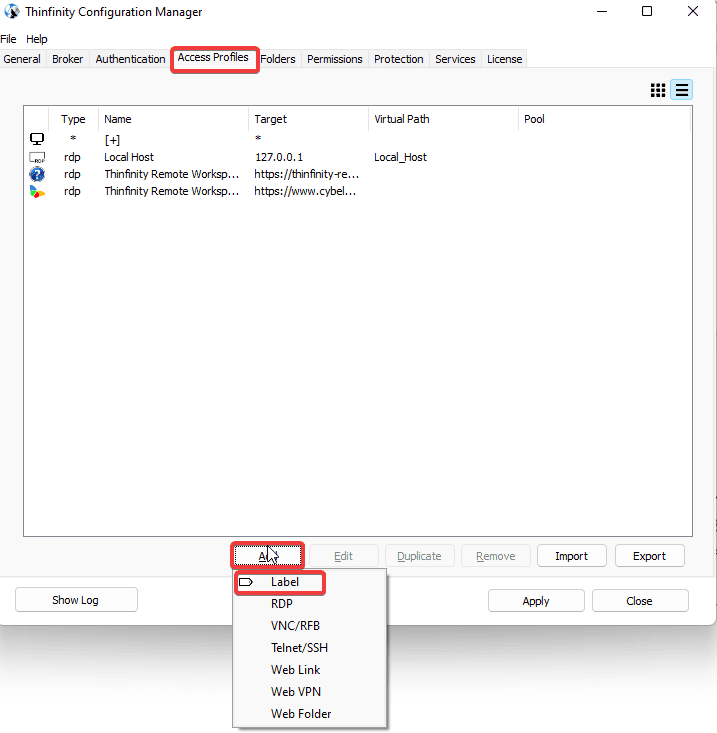
3. Select “label” from the drop-down menu.
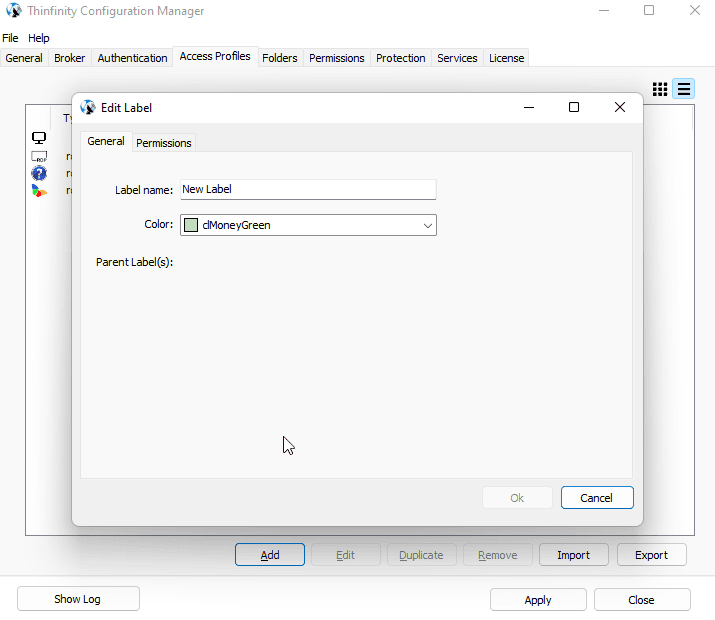
4. A new window will pop up. There you can name your label and pick a color for it.
5. After this, click “ok” and then “apply”.
6. Your label is created. You will be able to add profiles and other labels to Thinfinity Remote Workspace.
User created Labels:
You can also create labels from the Thinfinity Remote Workspace landing page:
1. Sign in
2. Click the “+” button

3. This will open the “Edit label” tab, where you can name the label and select a color for it.
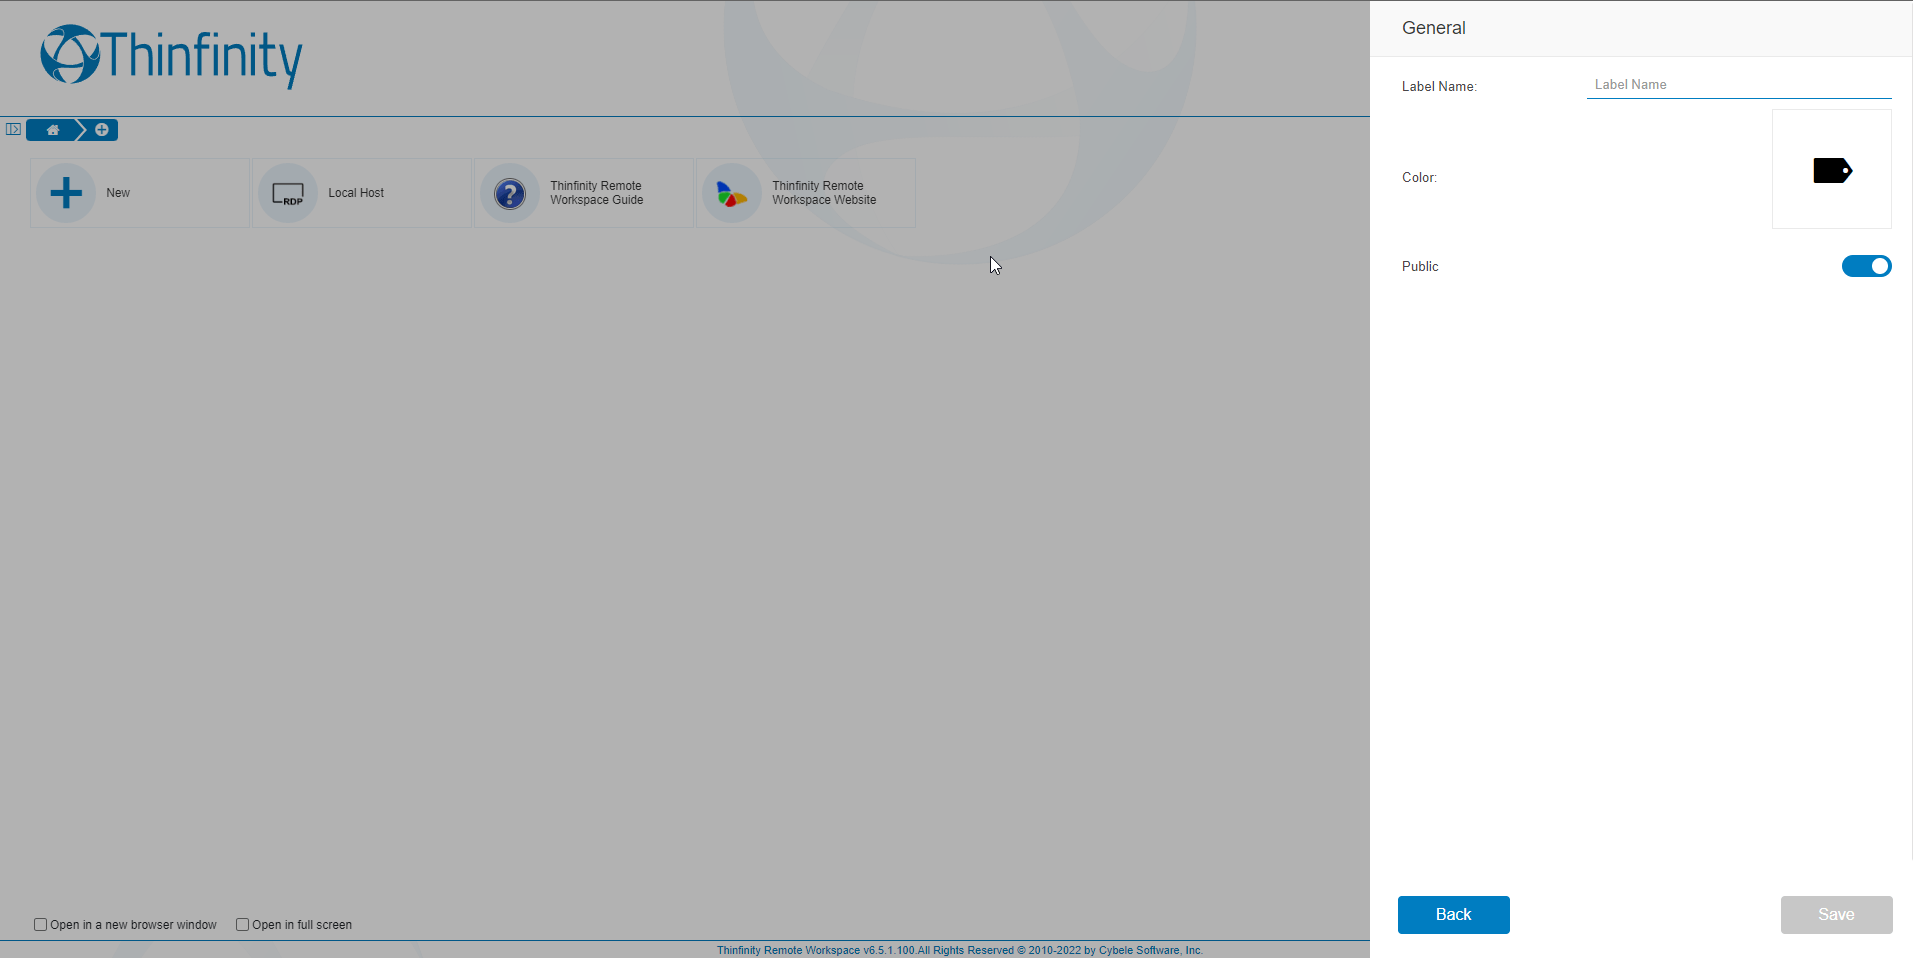
4. Once completed, the label will be added to the main menu.
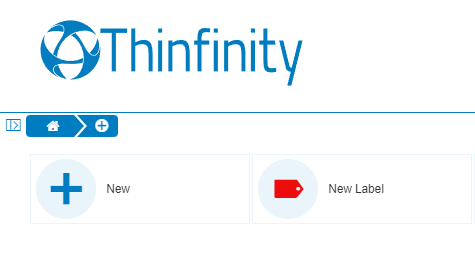
5. By clicking on the label, you will be able to create RDP profiles and other labels, which can also have their own labels and profiles within.
6. There’s a view option that you may find much more comfortable. It allows you to see the labels you have created and the labels within them.
7. Click on the button of the image below to access it.
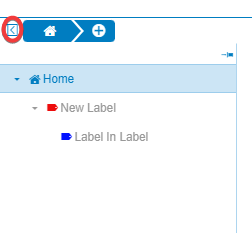
8. There you will find the option “home” and when you click it, a list will open all the labels. Click on any label to expand the menu and see its child labels. To see the contents of a given label, just click on it.
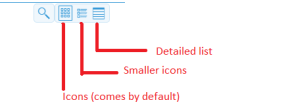
9. The menu shows icons by default, but you can either display smaller icons or a list view, where you can see the name of the profile, the labels created and the connection type.
Now you know how to create and manage labels in Thinfinity Remote Workspace.
Have any questions?
Book a call today to learn more about how Thinfinity can help your organization. We are always available to guide you and provide the best solution based on your specific needs.