How to customize the 'ThinDisk' name
In this step-by-step guide, you will learn how to change the name displayed for the ThinDisk file system drive.
First, open the Configuration Manager and go to the “Access Profiles” tab.
Once there, click on the connection and then click the “Edit” button.

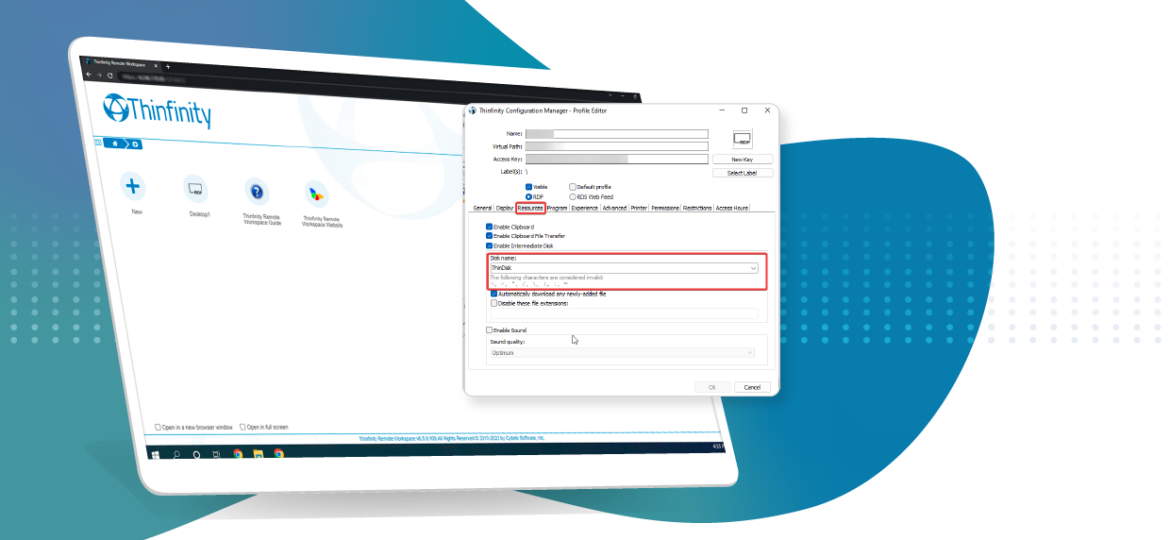
This will open the “Profile Editor”. While on it, go to the “Resources” tab.
You can change the Thindisk denomination in the “Disk name” text box.
Once done, press “Ok” and then “Apply”.

You can also change the name of the computer where the ThinDisk drive is displayed, by adding this line of code to the “Thinfinity.RemoteDesktop.Server.ini” file found on the “C:\ProgramData\Cybele Software\Thinfinity\Remote Desktop Server\DB” path:
[ComputerName]
Enabled=True
DefaultValue=ThinDisk
ServerName=Computer01
If you are using a load balancing environment, this chosen name will be visible for all users.
After making the changes, restart the Thinfinity Service Manager by going to Start > Run > services.msc
And that’s it! You have now customized the ThinDisk virtual drive name for file management.
Congratulations!
Book a call today to learn more about how Thinfinity can help your organization. We are always available to guide you and provide the best solution based on your specific needs.