When you need to connect to an RDS Collection Virtual machine (pooled or personal), you should set this option.
Follow the next steps and learn how to configure an RDS Collection profile:
1. Add a new profile.
2. On the profile Computer, inform the RDS server name or IP address.

3. Check the option "Connect to a Virtual Desktop on an RDS Collection".
4. Complete the 'Credentials' fields to authenticate against the virtual machine.
5. If you know the URL to the Terminal Service VM Host Agent (the URL follows this format tsv://VMResource.1.RD_Collection_Sa), you can inform it on the 'TSV URL' field and skip the next step.
6. If you don't know the TSV URL, click on the 'Browse' button and the following search dialog will be presented:
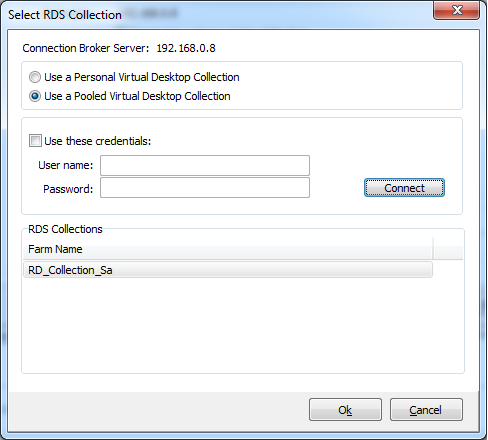
6a. Select whether you want to search for Personal or Pooled Virtual Desktop Collections.
6b. Click on the Connect button. If necessary, inform the credentials to authenticate against the RDS Server.
6c. The Collections found on the server will be presented on the bottom list. Select the one you want to create a profile for.
6d. Once the Collection is selected you can double-click on it or click on the OK button.
6e. The TSV URL will be set on the correspondent field.
7. The other profile settings should be configured like any regular profile (Display, Resources, Program, Experience, Advanced, Printer and Permissions).
8. Once you are done configuring the profile, press the OK button and then Apply the changes.