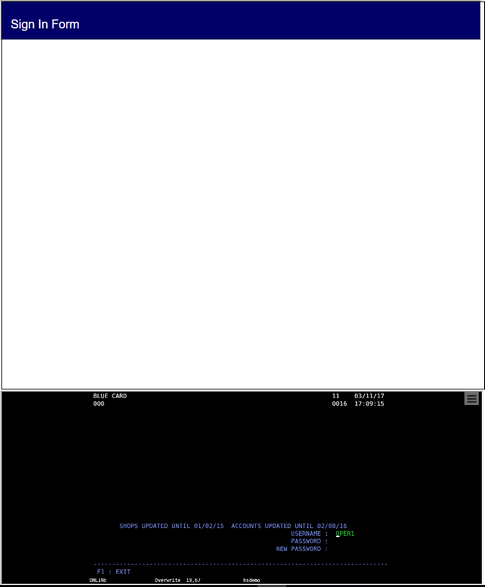
In order to start testing the example application (to see how the application reacts to the terminal screen change) we will use a simple page as show below.
<html>
<head>
<meta charset="utf-8">
<meta http-equiv="X-UA-Compatible" content="IE=edge">
<meta name="viewport" content="width=device-width, initial-scale=1, maximum-scale=1, user-scalable=no">
<title>Example Application</title>
<link rel="stylesheet" href="css/styles.css">
</head>
<body>
<div class="fullbox">
<div class="header">
<div class="title">Sign In Form</div>
</div>
</div>
</body>
</html>
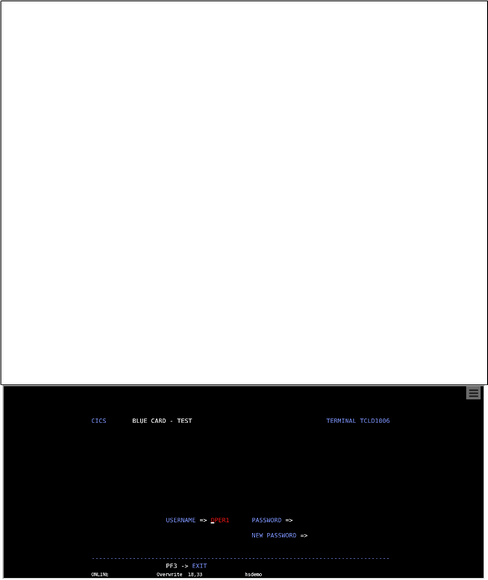
The images depicted below, show the browser contents when (1) the application has just been launched and (2) after pressing the <Enter> key:
1.
2.
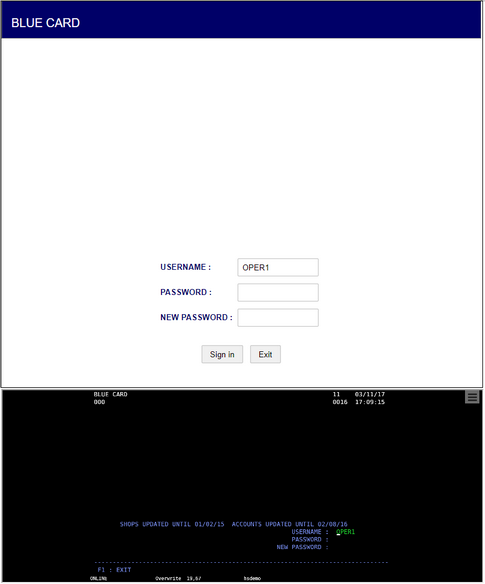
In order to complete the page design, we will add the user log-in entry fields and their labels, as well as a 'Sign In' and 'Exit' buttons. Both input fields and labels are bound to the HostSurfer fields collection, through AngularJS data binding (that is, the synchronization between the model and the view).
<html>
<head>
<meta charset="utf-8">
<meta http-equiv="X-UA-Compatible" content="IE=edge">
<meta name="viewport" content="width=device-width, initial-scale=1, maximum-scale=1, user-scalable=no">
<title>Example Application</title>
<link rel="stylesheet" href="css/styles.css">
</head>
<body>
<div class="fullbox">
<div class="header">
<div class="title">{{hs.R1C2}}</div>
</div>
<div class="main">
<div class="floatbox">
<table class="verticalTable">
<tr>
<th>{{hs.R19C55}}</th>
<td><input type="text" size="13" maxlength="6" ng-model="hs.username" onkeypress="checkkey()"/></td>
</tr>
<tr>
<th>{{hs.R20C55}}</th>
<td><input type="password" size="13" ng-model="hs.password" maxlength="6" onkeypress="checkkey()"/></td>
</tr>
<tr>
<th>{{hs.R21C51}}</th>
<td><input type="password" size="13" ng-model="hs.newPassword" maxlength="6" onkeypress="checkkey()"/></td>
</tr>
<tr><td colspan="2"> </td></tr>
<tr>
<td colspan="2" style="text-align:center"><span class="button" id="login_btn" tabindex=0 onclick="hs.navigate('main')">Sign in</span> <span class="button" id="exit_btn" tabindex=0 onclick="hs.navigate('exit')">Exit</span></td>
</tr>
</table>
</div>
</div>
</div>
</body>
</html>
Please note that the 'onclick' event of the 'Sign In' button invokes the 'main' action through the "hs.navigate('main')" property value. Likewise, if the user presses the 'Exit' button, 'exit' action will be called by means of "hs.navigate('exit')" .
The following image depicts how the page will look like after the additions: