The Macro creation process is very simple. You can create it on an active connection through the Connection view Menu.
Creating a Macro
|
1. Open the Settings Click the Settings button and a menu will be presented. |
|
2. Record Click on the "Record" button, execute the actions to be automated and send them to the host (enter key). |
|
3. Save the Macro Click on 'Save' button, also accessible through the settings button. |
|
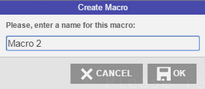
4. Name the Macro No more actions will be recorded, and you will be prompted for a name to the new macro. Enter a name and click 'OK'. |
|
Once pressed, the 'Record' button will be replaced by the 'Save' button. |
|
All macros saved for a particular connection will be available by clicking on the Macro's toolbar button. See also: Using Macros. |
To learn how to use and manage the macros you have created, see the next topics:
Read More: