
Creating/Editing a Keypad
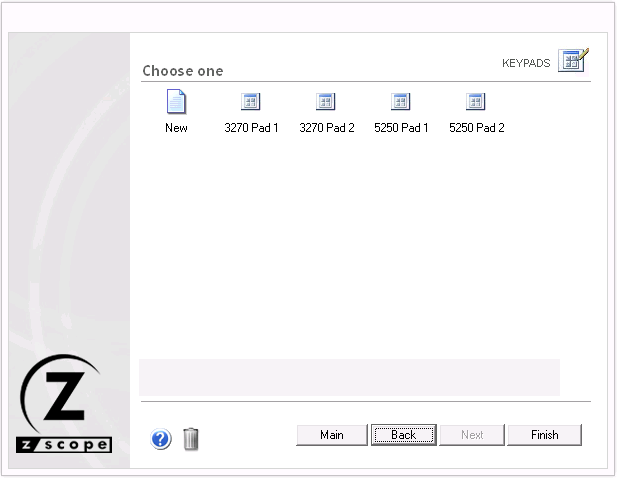
In the Keypads management dialog you will find a list of the existing Keypads. You will also find the New icon which you can use to create a new Keypad from scratch.
If you want to modify the attributes of a previously created Keypad, select it using the mouse and then select Next, or just simply double-select it.
In order to be able to use your Keypad within a Connection, you must first enable the Keypad for that particular connection in the Connections Settings dialog.
Adding a Keypad
Select the New icon and after you select Next, you will be presented with the Keypad Creation dialog.
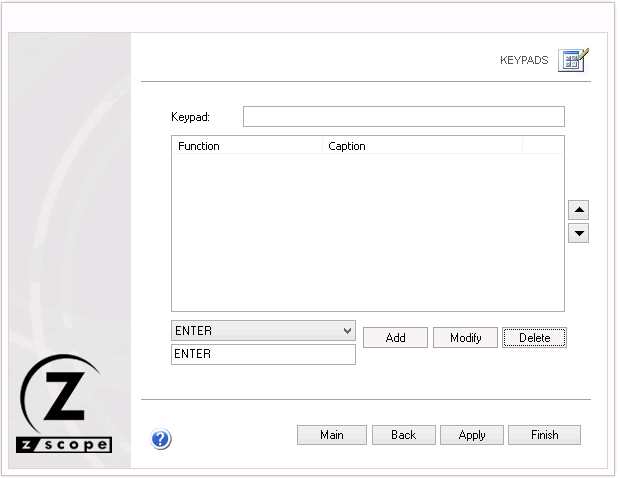
To add a new key to the Keypad, follow these steps:
-
Select a function to assign to the new key from the drop-down list.
-
Type a caption for the new key.
-
Select the Add button.
The new key you defined will now appear in the Keypad’s key list. To modify the key’s position within the Keypad, select it from the list and move it to the desired position using the key order selectors.
Modifying a Keypad
To modify an already defined key, do the following:
-
Select the key you want to modify from the Keypad’s key list.
-
Change the function and/or caption of the key.
-
Select the Modify button to apply the changes to the key.
Deleting a Keypad
To delete a key from the Keypad, proceed this way:
-
Select the key you want to delete from the Keypad’s key list.
-
Select the Delete button.
The key you selected will be removed from the Keypad’s key list.