Configure SAML with Okta
In this quick tutorial, we will show how to properly configure Okta SAML for Thinfinity Remote Desktop Server.
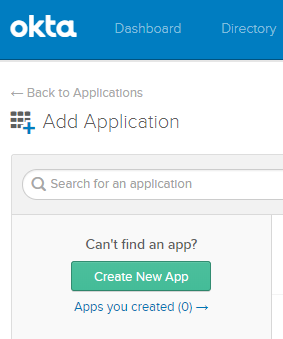
- Navigate to your Okta space, go to the Applications tab, and create a new application using the “Create New App” button :
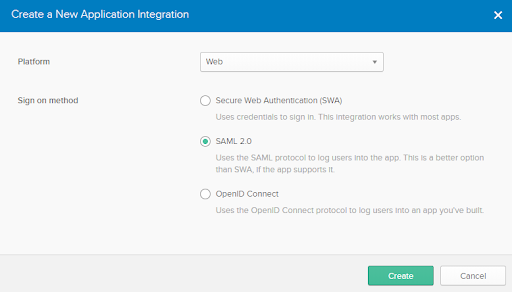
- Choose “SAML 2.0” as the Authentication Method.
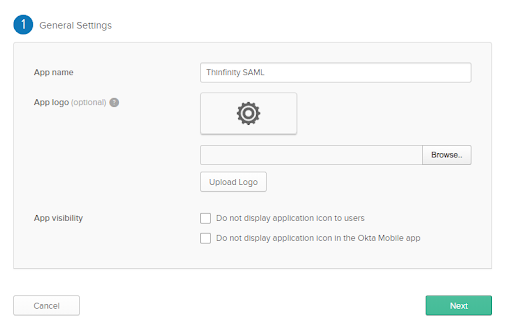
- Assign a name to the application.
- Configure the “Single sign-on URL” and “Audience URI” .
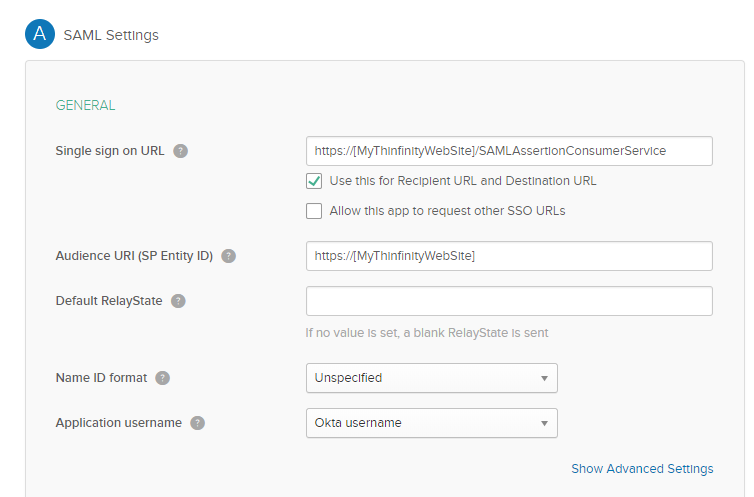
The “Single Sign-on URL” address should be the following : https://[MyThinfinityWebSite]/SAMLAssertionConsumerService
The Audience URI should be the URI used to connect to Thinfinity : https://[MyThinfinityWebSite]/
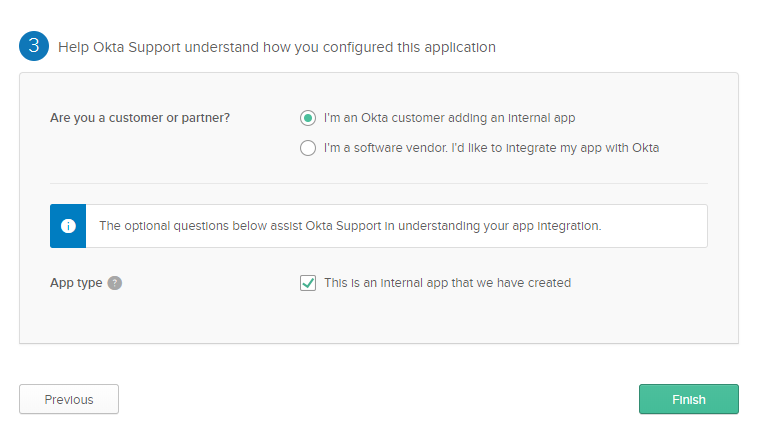
- Choose the Feedback options that apply to your application :
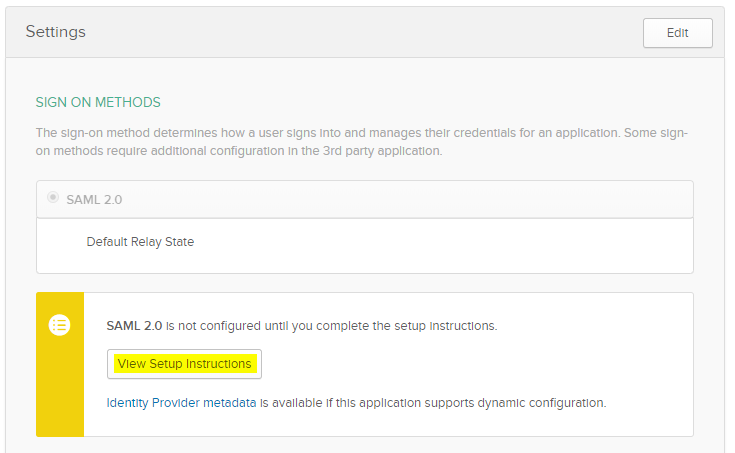
- Now that the application is created, it should redirect you to the “Settings” window. Select “View Setup Instructions” for further information :
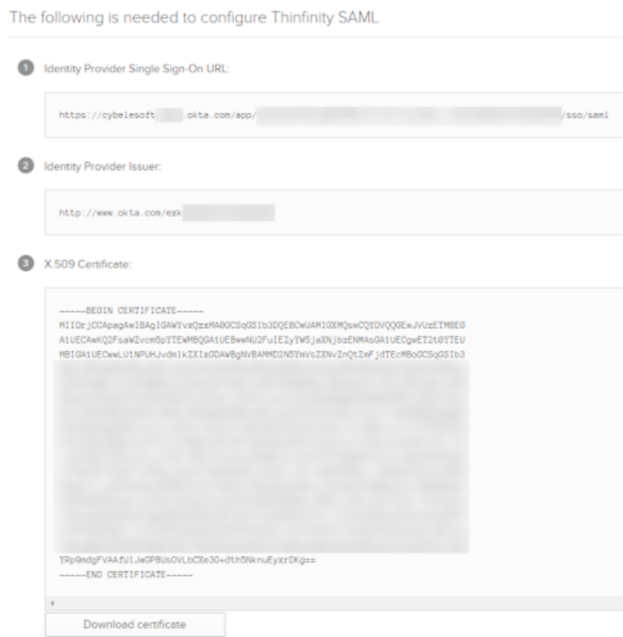
In here you will get the “Identity Provider Single Sign-on URL”, the Identity Provider Issuer, and the Certificate provided by Okta.
- Now, open the Thinfinity Remote Desktop Server Manager or Thinfinity VirtualUI Server manager, navigate to the “Authentication” tab, press the “Add” option and select “SAML” :
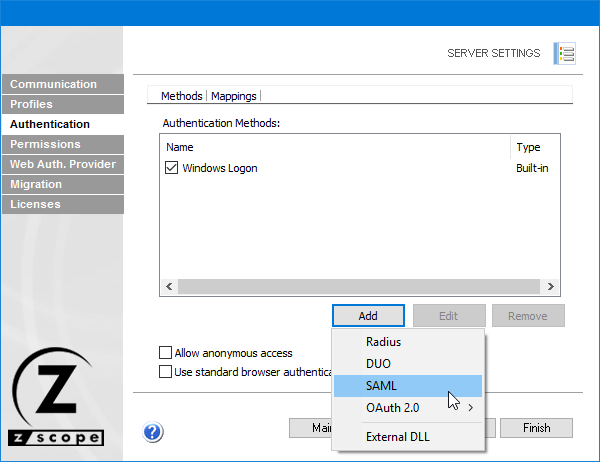
- In here, you will have to add the different values provided by Okta in order to enable SAML :
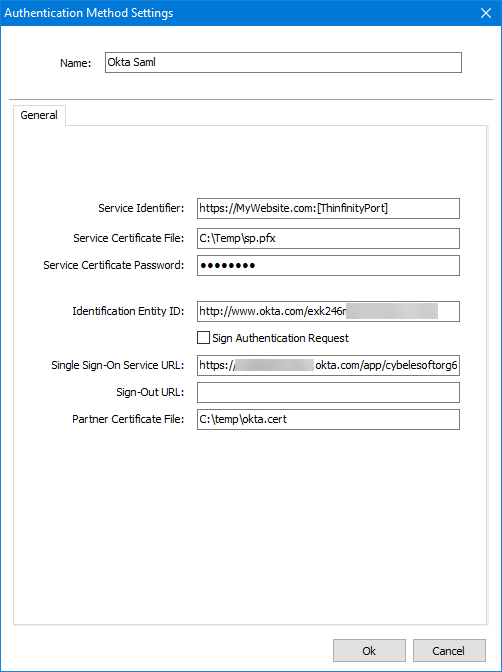
Service Identifier = Audience URI (SP Entity ID)
Service Certificate File = Your certificate’s file.
Service Certificate Password = Your certificate’s password.
Identification Entity ID = Identity Provider Issuer
Single Sign-On Service URL = Identity Provider Single Sign-On URL
Sign-Out URL = This value is optional.
Partner Certificate File = X.509 Certificate provided by Okta.
After you finish adding all those values, press “Ok”.
10 ) Select the “Mappings” tab and then press “Add” under the Authentication ID Mask.
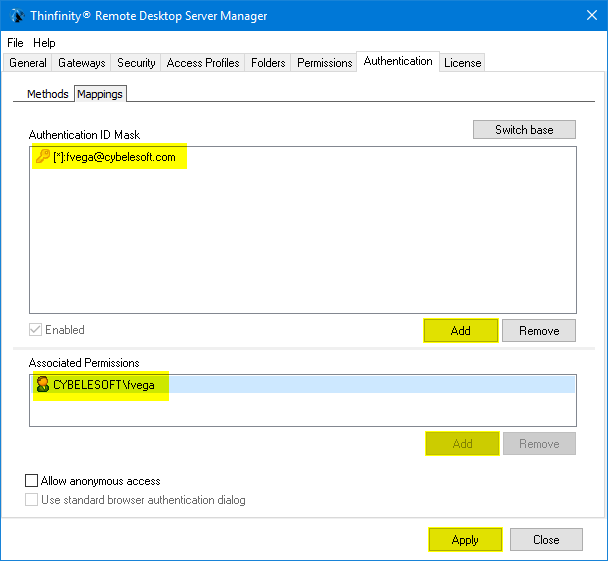
Add the email address of the Okta user you want to validate and press “Ok”.
Then, under the “Associated Permissions” field, press on the “Add” button and search for the Active Directory User
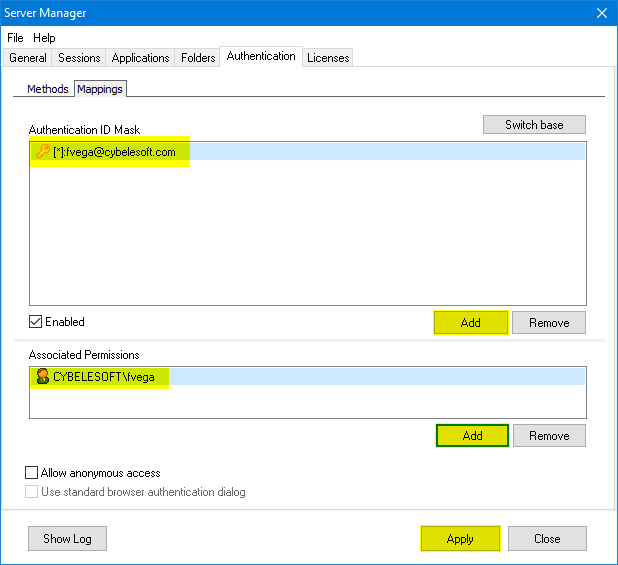
After you add the appropriate mappings, select the “Apply” button.
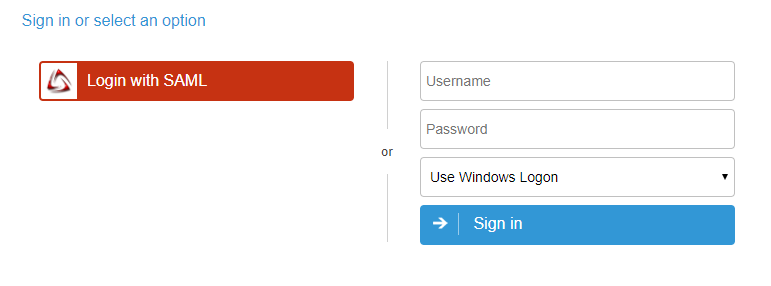
- Navigate to the z/Anywhere’s landing page, and you should see the “Login With SAML” option listed as an Authentication Method.